Basic car upgrades often begin with modest jobs: replacing wiper blades, fitting new floor mats, or installing a phone mount. Even simple work goes more smoothly when the right tools are ready. Before choosing equipment, consider your vehicle, the task, and your experience. The key question is what tools are needed for basic car upgrades, and the answer depends on what you plan to change.
A reliable starter kit usually includes a socket and wrench set, screwdrivers, pliers, a torque wrench, and a tire-pressure gauge. A trim-removal tool can help prevent scratches around interior panels. For some newer vehicles, a compatible OBD-II scanner may help identify warning codes, though it does not replace professional diagnosis. Small details matter. Start with safety. Wear eye protection and gloves when appropriate, park on level ground, and use correctly rated jack stands if a repair requires lifting the vehicle. Never work beneath a car supported only by a jack.
This guide focuses on practical tools for common, beginner-friendly upgrades, along with what each tool can—and cannot—do. Check your owner’s manual and follow the vehicle maker’s torque specifications. A tool that fits one model may not suit another. That part is easy to overlook. Some jobs also turn out harder than expected, and stopping to reassess is sensible, not a failure. Choosing durable, correctly sized tools can reduce frustration, but no kit makes every job safe for every beginner.
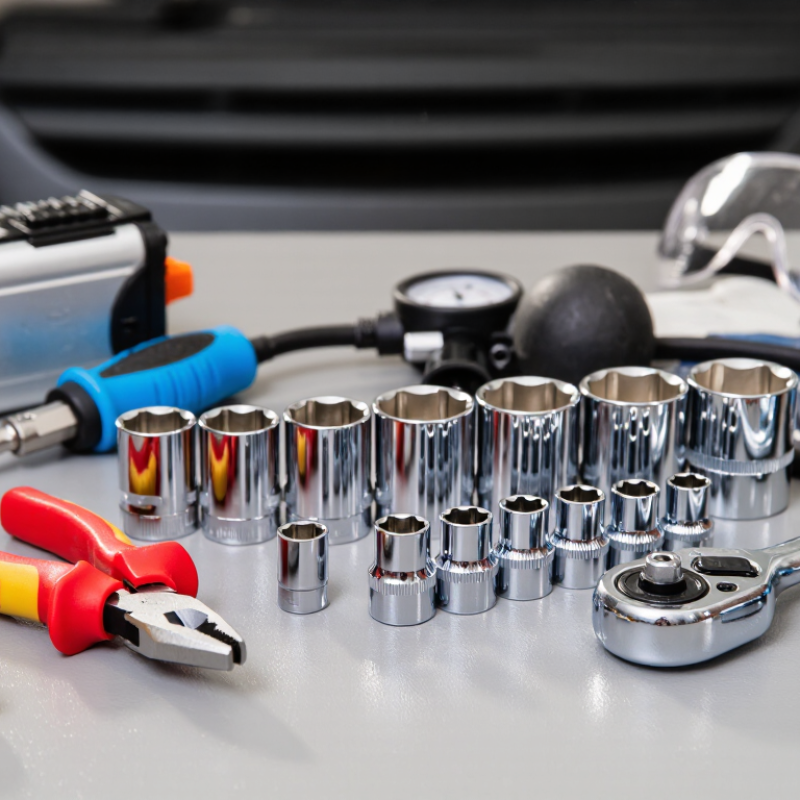
Basic car upgrades are small changes that improve comfort, visibility, or convenience without redesigning the vehicle. Examples include replacing wiper blades, fitting a cabin filter, or adding a secure cargo organizer. In 2026, many vehicles still use model-specific clips and electronics. The right tool depends on the job. A socket set, screwdrivers, trim-removal tools, work light, and gloves cover many simple tasks. Still, “basic” is not universal.
Check the owner’s manual and reliable service information before buying tools or parts. Fastener sizes, access points, lifting locations, and torque values vary by model and year. A torque wrench helps prevent under-tightening or damaging threads. If lifting a vehicle, use correctly rated jack stands on firm, level ground, and never rely on a jack alone. Newer vehicles may also need electronic resets or sensor calibration after certain changes. High-voltage systems require qualified service. I once assumed a trim panel would clip off easily; it did not, and patience would have saved a broken clip.
Tips: Photograph the original setup, compare replacement-part fitment by year and trim, and keep removed fasteners labeled. Stop if a connector, warning light, or unexpected resistance appears. A small pause is cheaper than guessing.
A safe workspace makes basic car upgrades easier to control. Park on firm, level ground, away from moving traffic. Set the parking brake and place wheel chocks against the tires that will stay on the ground. Let hot components cool before touching them. Good lighting matters; a small lamp can reveal loose clips or spilled fluid. Keep the floor dry and clear, especially around your feet. Small steps matter.
Tips: Wear safety glasses and suitable gloves. Use a fender cover to protect paint from tool marks. Keep removed screws in a labeled tray, not on the hood. Check the vehicle manual before disconnecting electrical connections, and never work beneath a car supported only by a jack.
Before starting, gather the tools and parts you need, then inspect them for damage. Keep a fire extinguisher nearby and ensure the work area has fresh airflow, particularly when the engine may run. Avoid loose sleeves and jewelry near moving parts. It is easy to underestimate how quickly a tidy job gets cluttered, so pause and reset the space if tools begin spreading around. If a step feels uncertain, stop and verify the procedure rather than forcing a fastener.
A basic car upgrade often needs fewer tools than expected, but the right fit matters. Keep a metric socket set, combination wrenches, and a ratchet within reach. Add screwdrivers, needle-nose pliers, and a plastic trim-removal tool for clips and interior panels. A torque wrench is important when a service manual specifies tightening values. Guessing can damage threads or leave a fastener too loose. Check the vehicle’s manual before starting, since sizes and procedures vary.
Set the tools on a clean tray so small fasteners do not disappear under the seat. Use sockets that sit fully on each fastener; a loose fit can round its edges. For work beneath a raised vehicle, use rated jack stands on firm, level ground, and never rely on a jack alone. Keep safety glasses nearby. Small details matter. I have found that rushing a stubborn trim clip often breaks it, even when the tool kit is complete. Pause, inspect how the clip is attached, and work gently. A magnetic pickup tool can help retrieve dropped bolts, though it will not rescue every awkward mistake.
| Tool | Useful Specification | Common Upgrade Tasks | Practical Use Notes |
|---|---|---|---|
| Metric socket and ratchet set | Commonly used sizes include 8–19 mm; a 3/8-inch drive covers many general tasks. | Removing battery clamps, interior trim fasteners, and accessible engine-bay hardware. | A set with six-point sockets helps reduce the chance of rounding hex fasteners. Check whether the vehicle also uses other fastener types. |
| Combination wrench set | Metric sizes such as 8–19 mm are useful for many passenger vehicles. | Loosening or holding nuts and bolts where a socket cannot fit. | Use the box end when possible for a more secure fit; avoid forcing a wrench that does not match the fastener. |
| Screwdriver set | Include several Phillips and flat-head sizes. | Replacing cabin filters, accessing some interior panels, and fitting simple accessories. | Match the tip to the screw head to reduce slipping and damage. Many modern vehicles also use Torx fasteners. |
| Torx and hex key set | Choose a range of commonly sized Torx bits and metric hex keys. | Removing trim, brackets, and accessory mounting hardware on vehicles that use these fasteners. | Confirm the fastener type and size before applying force; Torx and hex profiles are not interchangeable. |
| Trim-removal tools | A small set of non-marring plastic pry tools. | Removing door-panel covers, dashboard trim, and clips for accessory wiring. | Plastic tools are less likely than metal pry tools to scratch or dent finished interior surfaces. |
| Needle-nose and combination pliers | One long-nose pair and one general-purpose pair cover many light-duty tasks. | Handling small clips, positioning wires, and gripping accessible components. | Use the correct pliers for the task; do not use them as a substitute for a properly sized wrench on fasteners. |
| Torque wrench | A 3/8-inch-drive model with a range suited to the vehicle’s specified fastener torques is useful for general work. | Tightening wheels or other components when the vehicle service information specifies a torque value. | Follow the vehicle manufacturer’s torque specification and the wrench instructions. Do not guess torque values. |
| Adjustable wrench | A medium-size wrench with a smoothly operating jaw. | Occasional work on suitable non-critical nuts and fittings. | Use a fixed-size wrench when available. Keep the adjustable jaw snug against the fastener to reduce slipping. |
| Magnetic pickup tool | A flexible or telescoping tool can help reach confined areas. | Retrieving a dropped steel nut, bolt, or washer from an accessible engine-bay area. | It will not pick up non-magnetic materials such as many aluminum or plastic parts. |
Safety note: Use vehicle-specific service information for fastener sizes and torque values. For work underneath a vehicle, use properly rated jack stands on a firm, level surface; never rely on a jack alone.
Modern vehicles need more than a socket set when you add accessories or troubleshoot a warning light. A reliable scan tool can read fault codes, display live sensor data, and show freeze-frame details from the moment a problem occurred. These clues help separate a weak battery from a sensor fault. Choose a tool that supports the vehicle’s systems, not just basic engine codes. Compatibility matters.
Electrical checks call for a digital multimeter, a fused jumper lead, and suitable back-probes. Measure battery voltage before and during cranking; a steady reading can still hide a poor connection. Check voltage drop across ground points, too. A test light is useful for simple circuits, but it can damage sensitive electronics if used carelessly. Read the vehicle’s service information before probing unfamiliar wires.
Keep notes. Record codes and measurements before clearing anything, then compare readings after the repair. An OBD data log can reveal intermittent faults that disappear in the driveway. It is easy to overbuy here. Expensive tools do not replace careful testing, and a basic meter has limits. Avoid working on high-voltage hybrid or electric systems without the required training and insulated equipment. One overlooked connector can undo an otherwise tidy upgrade.
A stable lift begins with the ground, not the jack. Park on firm, level concrete, chock the wheels, and support the vehicle with stands rated for its load. OSHA standard 1910.244 requires jacks to display their rated capacity. Never work beneath a vehicle held only by a hydraulic jack. A creeper helps, but it does not replace support. Small detail. Check each stand’s locking mechanism before loading it.
For fitment, use a tape measure for broad clearances and calipers for tighter gaps around brackets or fasteners. A torque wrench helps prevent guesswork when tightening specified bolts; follow the vehicle’s service information, not a universal setting. The U.S. Bureau of Labor Statistics recorded 5,283 fatal work injuries across all industries in its 2023 Census of Fatal Occupational Injuries. That figure does not measure DIY repair risks, but it is a useful reminder that workshop hazards deserve respect. Recheck measurements after parts are positioned. I still find that awkward access can make a careful measurement less reliable, so pause and repeat it before drilling or tightening.
Select lifting, measuring, and fastening tools for precise work.
The chart shows representative torque ranges commonly found on passenger vehicles. A 20–200 Nm torque wrench covers many routine fastening jobs, while a 2-ton floor jack and matching axle stands are practical minimum-capacity choices for basic upgrades. A 150 mm digital caliper is suitable for measuring common component dimensions and clearances. Always confirm the exact torque specification and lifting points in the vehicle service manual.
Keep a metric socket set, combination wrenches, a ratchet, screwdrivers, needle-nose pliers, and a plastic trim tool nearby. Use a torque wrench when specified.
It can release interior clips with less risk of scratching panels. Pause and inspect each clip; forcing it can break.
Place tools and bolts on a clean tray. A magnetic pickup tool may retrieve dropped bolts, but awkward spots can defeat it.
No. Use rated jack stands on firm, level ground, and chock the wheels. Never rely on a jack alone.
Confirm their rated capacity suits the vehicle, and inspect each locking mechanism. Keep the vehicle on firm, level ground.
Use one when the service information gives a tightening value. Avoid guessing; a fastener can end up too loose or overtightened.
Use a tape measure for broad clearances and calipers for tighter gaps near brackets or fasteners. Recheck measurements after positioning parts.
Wear safety glasses, and remember that a creeper does not replace vehicle support. I still find awkward access makes measurements easy to misread. Take another look.
Basic car upgrades are easier and safer when you choose tools for the work your vehicle actually needs. Start by identifying the upgrade tasks and checking any vehicle-specific requirements, then prepare a clean, level workspace with good lighting. Protect the paint, interior, and nearby components with suitable covers, and keep tools organized to reduce the chance of damage or mistakes.
For common tasks, assemble dependable hand tools such as sockets, wrenches, screwdrivers, and pliers. Modern vehicles may also call for a diagnostic scanner, a multimeter, and insulated electrical tools. Add properly rated lifting equipment, wheel supports, measuring tools, and a torque wrench for stable access and accurate fastening. If you are wondering what tools are needed for basic car upgrades, prioritize safety equipment and tools suited to your specific vehicle, and consult its service information before beginning.

Motix Car